


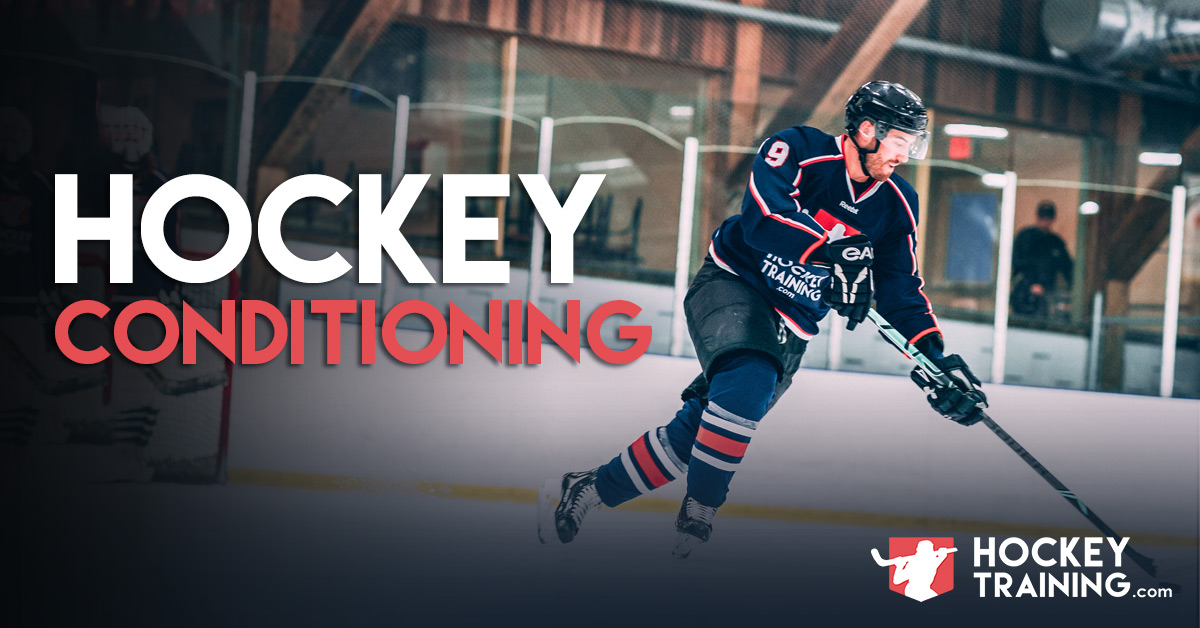
Welcome to the Hockey Conditioning Training guide. This is the complete formula you need to take your hockey conditioning to an elite level.
In addition to utilizing the hockey conditioning formula found on this page, I would highly recommend checking out the FREE Relentless Conditioning Package here where you will get instant access to exclusive hockey conditioning workouts and advanced tactics to keep your legs fresh and moving fast all game long!
Whether you are a hockey player with big hockey dreams or a coach looking to help out hockey athletes, this is the hockey conditioning training model you need.
Because this Hockey Conditioning guide might be tough to finish in one sitting we’ve included a table of contents that you can use to come back to resume your reading. Enjoy!
Table of Contents
- Introduction
- What is Conditioning?
- An Overview of Energy System Use
- Energy Production Analysis and Integration
- Conditioning Adaptations
- The Importance of AMPk
- General vs. Specific Work Capacity
- Optimal Mobility for Optimal Conditioning
- Using Plyometrics for Hockey Conditioning
- Using Sprint Variations for Hockey Conditioning
- Using Tempo Runs for Hockey Conditioning
- Using Hockey Conditioning for Sport Specific Fat Loss
- The Top Three Conditioning Mistakes That are Holding You Back
- Sample Hockey Conditioning Periodization Model
- Sample Hockey Conditioning Workouts
- Conclusion
Conditioning Training Introduction
Although hockey started in the 1800’s and the NHL has been around since 1917, the science behind training hockey athletes is still in many ways in its infancy.
While many other sports that are so heavily dependent upon conditioning have relatively evolved methods of training built on a rock-solid foundation of scientific literature, hockey conditioning still seems to catch waves of silliness with many coaches prescribing totally random fads, gimmicks, and tools based solely on speculation and marketing hype rather than good science.
Much of these tactics, to the trained eye, seem completely without reason or even a true understanding of human performance.
Even at amateur levels, many track athletes are incorporating things such as heart rate monitors, power meters, mileage logs, perceived exertion scales, etc. to systematically develop the energy systems that are most conducive to their particular event.
Elite level sprinters could easily give you a breakdown of their anaerobic threshold, V02 max, and sprint times from last year on any random training session.
Most hockey athletes, on the other hand, have no idea what their resting heart rate is or why that would ever be important… that is if they even own a heart rate monitor. And yes, this even includes the best hockey athletes on the planet today.
The undeniable truth is that many hockey athletes today are successful despite their training, and not because of it.
There are many hockey athletes who could have made the team who never did and many games that could have been won but never were.
Perhaps most unfortunate, a vast amount of untapped performance that never lived up to their true potential.
The problem isn’t at all that hockey players aren’t willing to work hard…
It’s that they haven’t yet been taught how to work smart.
When you have discussion forums, blogs, and DVDs dedicated to showing hockey players that they need to squat in skates, tie their hockey stick to a cable tower, and perform all exercises on a wobble board – then you have an industry that needs a complete rehaul and to finally get rid of the unnecessary application of the same uninspiring and unintelligent approach to hockey training.
It is my goal with this project to provide the gold-standard resource for both hockey players and hockey coaches to learn the truth behind the science of hockey conditioning and how to separate all of the fact from fiction.
This article represents the next stage in evolution for hockey conditioning and will be the most comprehensive guide on hockey conditioning available in the market today.
It is my #1 goal to provide clarity within this article and to change the trajectory of this industry moving forward, this begins with you.
By the time you are done reading this entire article, you will come to the realization that conditioning is a precise and delicate science that requires careful monitoring and thoughtful, strategic program design.
You’re going to learn true human performance and how it translates into the sport of hockey.
The best part?
You will not be given some random group class to join, but rather learn the innermost workings of physiology and be given the necessary tools analyze, measure, and identify exactly where your conditioning program is weak, and where your “weak link in the chain” is.
With this knowledge, you will turn your weaknesses into strengths and finally reach your true potential in this sport.
What is Conditioning?
I want to first make a big disclaimer on what real conditioning is.
Here’s the thing, all to often within this hockey industry people just lump the idea of “in shape” as “conditioned”. You will also hear statements get thrown around at your local gyms such as:
“Decathletes are the most conditioned athletes in the world”
Or
“Fighters are the most conditioned athletes in the world”
Is this really the case?
Or are we taking the definition out of context?
You cannot just use the word “conditioned” without context.
Although I don’t disagree that either of these athletes requires a great deal of cardiovascular development and muscular endurance, among many other things, the reality is that conditioning should be viewed exclusively as how well an athlete is able to meet the energy production demands of their specific sport.
A powerlifter who is able to generate a tremendous amount of force and power within a 6-second timeframe over the course of an entire 60-90 minute workout is equally as conditioned as a marathon runner who just ran a marathon.
These two may have varying opinions on what’s important…
Conditioning is more than “cardio”, conditioning is about being able to meet the demands of your sport for extended periods of time.
Each sport requires a different combination of power (ability to produce force quickly), strength (force production capacity), and endurance (ability to produce energy for an extended period of time).
Some sports will require more power than others with little need for endurance, while others may represent the exact opposite. Most team sports though, like hockey, will fall somewhere in the middle of this.
In order to maximize your sport performance, you must analyze the demands of the sport and adjust your programming accordingly.
Super important note here, in the next sections I am not teaching you the underlying physiology of energy system production just for fun.
I am teaching you each of the energy systems and what their exact demand is so that you can design your programming to create true hockey specific conditioning.
Without a fundamental understanding of the energy systems, you might as well be designing conditioning programs with a blindfold on and one hand tied behind your back.
“Getting tired” or “feeling a burn” means absolutely nothing without the correct context of how you reached that state of fatigue and what systems you are targeting with your approach.
When you have a firm grip on the underlying physiology, the result is that you are able to design your own programs that allow you to create the sport-specific energy you need to perform your best come game day.
If your muscles can generate Adenosine Tri-Phosphate (ATP, the fuel that our muscles run on) fast enough and for long enough, then you will have good conditioning for your sport. If not, well then you did a bunch of exercising, and not training.
An important point here – exercise is much different than training.
Exercising is simply being physically active and burning calories. This is A-OK for the general population who are just looking to lose some weight and improve their body composition.
Training, on the other hand, is utilizing the training principles that are deeply woven into the science of program design and combining that principal knowledge with your understanding of muscle physiology to create an exact result at an exact time over a periodized schedule.
To put it short, exercise is non-specific, and training is very specific.
We exercise for fun, we train for hockey performance.
An example can be brought upon the previously discussed marathoners and powerlifters.
If you ask someone on the street whom they think is more conditioned, the general population is probably going to give you a confused look and say, “obviously the marathon runner!”
But, a marathon runner is no more conditioned to do a powerlifting workout than a powerlifter is to run a marathon. Apples and oranges.
Conditioning is completely dependant on your sport-specific demands—not just how aerobically fit you are (as most people seem to define it).
When it comes to hockey athletes, they are alactic-aerobic athletes. Meaning, the game is predominantly composed of short, high-intensity bouts of effort followed up by longer duration, lower intensity bouts of effort.
But, we’ll get to how that all fits in later. For now, it’s important for you to understand the physiology behind the program design so that you are better able to apply the program design to get the best possible results for yourself or your team.
Frequently Asked Questions About Hockey Conditioning
Is running good for hockey?
Yes, running (especially sprinting) is great for hockey conditioning. Sprinting is great for alactic-aerobic training, and slower tempo runs are great for aerobic training. Although, you still need to be aware of what energy system you’re using as it’s easy to screw up with runing.
My friend doesn’t do conditioning training and he never gets tired, what gives?
Your friend is missing out on what his potential could have otherwise been if he incorporated intelligent hockey training into his regime. Don’t make assumptions based on people who are the exception to the rule.
An Overview of Energy System Use
I want to quickly discuss energy system integration while summarizing the energy systems for you as well to give you an easy overview.
Then, we’re going to take a little bit of a deeper dive into what energy production really means, and how this all connects for you out on the ice.
The ATP molecule consists of adenosine (a molecule of adenine joined to a molecule of ribose) combined with three inorganic phosphate groups.
Adenine is a nitrogen-containing base, and ribose is a form of sugar.
When ATP is combined with water and acted on by the enzyme ATPase, the last phosphate group splits away, rapidly releasing large amounts of energy (~7.3kcal per mole of ATP).
This process breaks ATP down into an unusable form of muscle energy known as ADP (di-phosphate, so only two now since it’s not tri), but, the alactic system is unique in that it can recycle that ADP if it wants to under the appropriate conditions by stealing a phosphate from creatine.
This is how creatine actually works at the cellular level, and why it’s a staple in the Hockey Training programs.
Cells generate ATP through three different systems:
- Anaerobic alactic (very high-intensity, short-duration movement)
- Anaerobic lactic (high-intensity movement up to 2mins in most cases)
- Aerobic (moderate to low-intensity movement for long durations)
These three energy systems do not work independently of one another.
When a person is exercising at the highest intensity they can possibly put out, even from the shortest sprints (10s or less) to the endurance-based events (60mins+), each of the energy systems are contributing to some degree towards the total energy need of the body.
Generally, one system is activated greater than the others (and this depends on what you’re doing) during a particular sport or workout structure.
The only exception to the “dominant energy system” is during a transition period from one energy system to another.
For example, in a 10-second 100m sprint, the alactic system will dominate, but both the anaerobic alactic and even aerobic systems will provide a small amount of the energy needed.
On the other end, if you performed a 10,000m 30-minute run—your aerobic system will dominate but your alactic and lactic systems will contribute some energy as well.
There is a reciprocal relationship between the three energy systems with respect to overall power and capacity.
The alactic system provides ATP at a rapid rate but for not very long, so it’s great for the short bursts of explosion that we need in order to perform things such as checks, breakaways, and shots.
In contrast, the aerobic system takes much longer to produce ATP, but the energy it can generate is essentially unlimited – which plays major dividends towards hockey games since they last up to two hours in some cases.
Frequently Asked Questions About Hockey Energy System Use
What are the energy systems?
- Anaerobic alactic (very high-intensity, short duration movement)
- Anaerobic lactic (high-intensity movement up to 2mins in most cases)
- Aerobic (moderate to low-intensity movement for long durations)
Do I really need to know this stuff? It seems really scientific.
To apply it, you don’t need to know the background of it if you trust that your coach has a thorough understanding of energy metabolism.
Energy Production Analysis
Although energy production sounds pretty straight forward when you just look at it like aerobic/lactic/alactic, but many hockey coaches miss some very important details along the way when designing programs and analyzing their athlete’s conditioning levels.
The reality is that the specific conditioning of these energy systems provides the specific fuel that you need in order to get your muscles to do the job you want them to do.
100m sprinter? Probably good to focus on alactic energy system development.
400m runner? Let’s put a bigger emphasis on lactic energy system development.
Marathon runner? An aerobic dominant approach to training is likely a good idea here.
Hockey athlete? Definitely going to need a delicate balance between Alactic-Aerobic.
Your muscle cells are living cells, just like all the other cells in your body.
They require energy at a constant rate to do their job of contracting and relaxing your muscles in a coordinated manner to move you around.
Your cardiac muscles require energy to pump blood throughout your body and recycle it back eventually, so the more active you are, the more active your heart has to be as well.
Lastly, your smooth muscle tissue, such as the muscle tissue that makes up your small intestines, is constantly working to process/digest/eliminate food—and requires energy every step of the way.
The fuel for all of these actions is ATP, it is the energy currency for life as we know it. Without ATP, there is no life.
Every last piece of food you eat is going to go through hundreds of chemical reactions that eventually break it down either into ATP directly, or into sugars/fats/proteins that can be stored for later use as ATP.
That whole process of creating an optimal meal plan for the best performance and recovery is largely about providing the exact biological energy our muscles need in order to perform the activities that the predominant energy system is going to need fuel for.
Breaking down energy production further, we are primarily looking at three different components of physical preparedness to know if our hockey athletes are at optimal conditioning levels and are ready to tryouts, camps, or the competitive season.
Additionally, we can use these as markers to see if our programming needs any tweaking to get a more customized result for a hockey athlete who may have a unique weak link in the chain, these three important pieces are:
- Rate of energy production
- Duration of energy production
- Efficiency of energy expenditure
Rate of energy production
The rate of energy production comes down to power development.
For those of you unfamiliar, power is much different than strength.
Power represents your rate of force development, whereas strength would represent your absolute strength.
For example, if you take two athletes who can both deadlift 500lbs, but, one athlete can deadlift the 500lbs faster than the other athlete—their strength is the same, but the one who did it faster is more powerful.
Why?
Because he was able to generate the amount of force required to deadlift the 500lbs faster than the other athlete, thus, making him more powerful.
Physics would define power as “the rate of work being performed”, but, in real life, it’s much more easily comprehended in the form of a deadlift. Or, your ability to take a full slapshot faster than your opponent.
In order to generate a crazy power level, your muscles need to be able to contract and relax with lightning speed.
For example, if you’re a fan of combat sports, sometimes there is a fight-ending punch that you barely even see. It was so fast, it put him to sleep and the opponent nor the audience ever saw it happen until they heard the *CRACK*
The “oh!” sound from the audience almost comes at a delay because the brain processing what they just saw took a split second of silence first before they could react.
This is important to point out because the faster your alactic system can generate this energy, the more power you will be able to generate.
In hockey, you’re working with athletes who want/need elite physiques and are in a sport that demands consistent and repeated high-power output efforts (shooting, skating, hitting, fighting, etc).
Put another way, if you want to properly train for hockey, you’re going to want to include some high-power training at a moderate to high frequency throughout your periodization strategy.
Especially near the end of the offseason, and throughout the entire in-season.
Duration of Energy Production
The duration of your energy production is what I mean when I’m always referring to “capacity” when talking about energy systems in videos, blogs, and even above.
Alactic capacity = The amount of time you can maintain the crazy high intensity (5secs? Or 15secs?)
Lactic capacity = The amount of time you can maintain the high intensity (1min? or 2mins?)
Aerobic capacity = The amount of time you can maintain aerobic level conditioning at a respectable intensity (20mins? Or 180mins?)
The duration of your energy production is fundamentally important to your understanding as someone who is interested in improving their hockey performance.
This duration refers to and sheds important insight on both your current capability and how much improvement you have left in the tank.
I want you to think about capacity in the lens of the duration of the activity you’re measuring. In other words, make sure you’re understanding what energy system is activated when you’re determining the capacity of one’s ability.
There are some major things that you need to take home and understand when it comes to the capacity of energy production.
- How fast do you burn through your fuel? (current conditioning level)
- How big is your fuel tank? (adaptations)
- How long will your fuel last? (energy economy)
- How prepared is your supply and demand chain (substrate availability via a well-designed diet)
- How prepared is your physiology for more energy expenditure? (fatigue management strategies)
In other words, if you increase the amount of horsepower you can produce you’re going to run out of gas sooner. Unless you find a way to increase how much gas your tank holds and how prepared you are when it’s time to rock.
When you’re capable of understanding and adapting to these various mechanisms of energy duration capacity, you will be able to go harder and longer. Plain and simple.
Efficiency of Energy Expenditure
Because I’m not a Stanley Cup winner, I probably shouldn’t be teaching you movement skills about how to perform skill techniques during a hockey game.
But, for completeness, I need to give a tip of the hat and acknowledge that skill and technique play an immeasurable role in energy economy.
When you improve your technique, and you’re able to better relax during competition due to confidence, you will massively improve your energy economy.
Your body works very hard to generate energy when you need it, but how effectively and economically it can create this energy to utilize this energy effectively depends largely on your technique.
For example, if you’re flailing your arms and legs around like a maniac while skating, you’re burning way more calories than you need to.
Or, if you’re anything like me, you have never utilized energy economy when trying to tread water in a pool.
My arms and legs are going crazy in water, and I have no efficiency whatsoever, whereas for others it looks like a totally effortless process.
This is economy vs. terrible technique.
Part of improving your hockey conditioning comes exclusively down technical ability, hockey players need to learn how to use the energy they produce as efficiently as possible through proper technique.
My program can work amazing for you, but if you’re technically an awful hockey player, you won’t be able to use the physiological tools I’m giving you to their potential.
Put another way, all of the conditioning training methods in the world aren’t going to help you if your movement mechanics and/or competition strategy sucks.
But, as you enhance your technique in both your sport and your workouts (don’t forget all your gym workouts have energy economy due to technique as well) you will gradually become much better at becoming efficient with your energy expenditure.
Just like everything else in life, it will take practice to get better.
Frequently Asked Questions About Energy Production For Hockey
Doesn’t nutrition give you energy? Shouldn’t it be listed here?
Yes, nutrition is a critical factor in providing your cells with the energy they need to go all three periods. We place so much importance on this that I wrote an entire hockey nutrition guide for you here.
Conditioning Adaptations

I am going to go ahead and skip all of the deeper physiology behind how each energy system creates its energy and all of the biological stimuli and adaptations that occur very simply because I wrote an incredibly extensive hockey-specific manual on this within the Next Level Conditioning 2.0 system.
If you need to brush up on this, I highly suggest you check that out.
Here, I’m jumping right into the adaptations that occur with regular and consistent endurance training that work to improve hockey performance.
In no particular order of importance, these include (but are not limited to):
- An increase in capillarization around the muscle fibers which improves local blood flow
- Increases in both mitochondrial number and density which improves your potential for energy as it is the mitochondria where ATP is produced
- Increases in the level of enzymes that are involved in energy production – essentially, allowing your “energy highway” to travel at 100mph instead of 60mph
- Increased buffering of fatigue-producing by-products in the muscle
- Increased utilization of lactate as a fuel source
- Changes in heart function such as how much blood will be pumped per beat, and how forceful the heart can pump that blood around the body
- An overall increase in oxygenation of the blood which leads to more oxygen being carried around to working muscle tissue
Something you have to keep in mind is that these adaptations will not only happen at different rates (in terms of the duration of training that needs to be applied in order to optimize them) but also tend to be affected by the type of training that you’re doing.
This is only one of the several reasons why I am totally opposed to the idea that hockey athletes only need to perform one method of conditioning to identify themselves as optimally conditioned for hockey performance.
No single intensity can possibly stimulate and/or optimize all of the above adaptations equally. It is completely foolish thinking to do so.
Practically speaking, hockey athletes should be using a variety of training zones (varying levels of conditioning intensity throughout their programming) to achieve different sets of adaptations as required by the specifics of their sport and their individual needs (to fix their weak points).
Endurance, V02 max, energy economy, lactate threshold, by-product buffering can all be targeted with specific programming combinations of frequency, intensity, and volume/duration.
Conceptually, this is no different at all than strength athletes using a variety of training zones for muscle hypertrophy, strength, power, or endurance.
I’m not sure why this basic idea of specificity (one of the most important scientific training principles in the entire training world) gets lost once you enter the world of hockey conditioning. It seems pretty straightforward.
It’s also worth noting that the adaptations on the mitochondria and enzyme production are the difference maker in what differentiates the training model to either have a greater effect on Type l muscle fibers or Type ll muscle fibers.
Again, yet another reason why no single intensity could ever possibly be considered optimal. The old “skate 100 laps until you puke” mentality is completely asinine.
I also want to make a quick reference to the fatigue producing by-products comment for those of you unfamiliar because many readers have been exposed to the idea that lactic acid/lactate causes fatigue.
Like everything in strength and conditioning, it turned out to be a lot more complicated as the research continued on.
Both lactate and lactic acid appear to be more beneficial than anything else. It’s certainly not the cause of fatigue, and is actually:
- The preferred fuel source for the heart
and - A substrate that can be converted into glucose in the liver and transported back to the muscles to be used as energy
This is why I said, “fatigue producing by-products” and not lactic acid like many of you may have suspected I would say.
If we were to make a more accurate statement, it looks like hydrogen ions (H+) is, in fact, a cause of fatigue within the muscle during high-intensity bouts of effort.
As it also turns out, your ability to deal with both lactate and H+ is a function of your aerobic system. This is because the mitochondria metabolize the acid into energy and clear the H+ out of the muscle cells.
Pretty cool, right?
This means that your aerobic capacity actually improves your anaerobic performance. Another strike against the coaches who only use one training modality.
With this part out of the way, I’m going to need to bore some of you (but excite the nerds) and discuss some of the finer molecular details surrounding one of the most impactful skeletal muscle triggers that provide you the beneficial endurance type adaptations that improve your hockey game.
While this may seem unnecessarily detailed for some of you only interested in the “how” and not the “why” – it actually provides a very solid foundation for some of the different training modalities I want to talk about and why I use them with my athletes.
Frequently Asked Questions About Hockey Conditioning Adaptations
Is it true that you can become dominant in one energy system so much so that it hurts the others?
Yes, this is absolutely true and is incredibly common for hockey athletes who overemphasize jogging and end up becoming aerobically dominant.
The Importance of AMPk
Like I said previously, I want to focus a little more on the adaptation side of the equation in this comprehensive article as the inner workings of each individual system can be found in extreme detail within the Next Level Conditioning 2.0 system.
In order to have this discussion appropriately, we need to dive down to the molecular level and identify where the stimulus for these adaptations are really coming from. As always, there are a whole bunch of them and it’s never as simple as 1 + 1 = 2.
When you take a look at the metabolic pathways; calcium levels in the muscle, fuel utilization (fatty acids and glycogen), and free radical production are all turning out to play key roles in the stimulus that occurs from endurance training (which if you are properly recovered, that stimulus will turn into the adaptation of improved endurance).
Reactive oxygen species is particularly interesting because we have a growing body of data now that has linked high-doses of antioxidants to actually reduce the number of benefits you are gaining from exercise.
Simply put, if you lessen the stimulus (via antioxidants blunting reactive oxygen species production), you also lessen the adaptation.
However, the most important component of what determines the end-point adaptation is something called adenosine monophosphate kinase (AMPk).
Now, I have discussed AMPk before when it comes to scheduling your training properly, so if you have been a follower of my work you should be up to speed.
But, for those of you unfamiliar with that article and/or unfamiliar with the research that has occurred since I wrote that, I’ll do a quick yet necessary recap here.
Essentially, AMPk senses energy within your muscle cells and it reacts in response to the energy state of the muscle cell – this response can have a number of effects on your physiology. For example, when AMPk is activated, your muscle will:
- Burn more fat for fuel
- Take up circulating glucose from the bloodstream and store it as lean tissue in the muscle
- Improve insulin sensitivity
It’s also worth mentioning that AMPk activation will immediately shut down mTOR activity, which is yet another energy-sensing molecule.
This explains a lot when it comes to poor programming design by some hockey coaches because mTOR is the primary driver for anabolism within the muscle cell to support growth and strength development.
How you structure your training schedule and overall program design will either emphasis AMPk or mTOR (or if you’re really good, create a combination of both).
The kinetics of mTOR are complicated and won’t need to be discussed further in this project.
But, what is relevant to this project is the known fact that AMPk stimulates mitochondrial biogenesis (which is the creation of new mitochondria so that you can burn more energy for longer).
When you think about a sedentary person who then has the New Year’s resolution goal of “Running a marathon” – and then half-way through the year, through good diet and training, they actually do accomplish their goal…
This is simply the over-expression of AMPk stimulation through a well-designed program to create more and more endurance in the skeletal muscle tissue.
This is immensely critical to understand for hockey conditioning programming because this stimulus/adaptation process will positively impact both your aerobic and anaerobic energy systems.
How?
Well, mitochondria serve the function of processing oxygen.
And as I alluded to previously, mitochondria are also involved in buffering and filtering out fatigue producing by-products out of the muscle cell. Having a bigger mitochondrial/aerobic engine will:
- Allow you to produce more power out on the ice without having to also produce as much fatigue by-products
- When you’re muscle finally do create the fatigue by-products, your body will be better able to metabolize them quicker
This is why it’s important for hockey players to include aerobic training in their GPP (general physical preparation) training phases.
For example, in the initial 1-3 phases of the offseason, I will begin with a much higher load of aerobic work (usually tempo runs and circuits) to allow my athletes to gain an aerobic base, but, as the offseason starts to come to a close and get closer to the competitive season – I will slowly taper out the aerobic work and replace it with anaerobic work to drive the degree of training specificity up but also allow them to get better gains from their anaerobic work due to their strong foundation in aerobic conditioning.
So, you’re probably thinking “Alright Dan, this all sounds good and well, but how do we turn on AMPk to get these kinds of results?”
Essentially, AMPk is activated when the energy cells of your muscles are disrupted.
Under normal conditions, the body is using ATP for fuel and can make as much as it will ever need.
But, when you start exercising, the body can’t make ATP quick enough and you get an increase in something known as ADP (as mentioned above in reference to creatine supplementation).
ADP will then be further metabolized into AMP (adenosine monophosphate).
It is this shift in the ratio of ATP to AMP that activates AMPk.
What happens here is that your cell senses that its energy levels have been disrupted so it turns on a bunch of other mechanisms to try and combat that.
AMPk is a big part of “what happens” when your body is trying to make up for the lack of available energy to meet current physical activity demands.
When AMPk is activated through well-designed hockey conditioning programs, you get a hockey-specific adaptation.
Mitochondria grow in number and density, your aerobic energy enzymes increase, and a bunch of other things all fall into place which ultimately gives you improved endurance out on the ice.
Making things simpler, if you look at it from a common-sense point of view it makes a whole lot of sense why this occurs.
Increasing your conditioning simply means that your body is better able to produce energy and continue to do so without running into fatigue issues.
So, the stimulus for this is an imbalance between the energy needed and energy available.
The power output or endurance duration that had previously created an imbalanced ratio between ATP and ADP no longer does due to your improved adaptations (mitochondria, enzymes, blood flow, etc).
This also clearly explains why you have to continue to overload your conditioning training in some way or another.
If you don’t increase in either duration, intensity, density, or some combination of all three – your body won’t need to adapt because your ATP to ADP ratio will already be good enough to do the job.
No energy disruption?
No activation of AMPk to cause an adaptation.
No adaptation?
No continued improvement upon your hockey conditioning levels.
It’s important to note as well that AMPk can be activated by many different types of stimuli and this has extreme relevance for the different methods of conditioning that have been proven to be successful over the history of the strength and conditioning world.
Some research has demonstrated that AMPk is only activated if a certain level of endurance-based intensity has been surpassed, however, even at low intensities, long enough durations of training can still stimulate AMPk and adaptations to training.
Again, this is why the “one size fits all” approach will never work, even within the realm of AMPk stimulation alone – let alone the different muscle fiber type usage of the molecule.
A well-designed hockey conditioning program must optimize all of the stimuli at the right level and in the correct dosage in order to generate a hockey specific conditioning result.
Beyond this, the programs also need to be progressed intelligently over time using either intensity, duration, or density – any of these would be great options and it would totally depend upon the program design to determine which one would be best at a certain time.
Frequently Asked AMPk Questions
That went a little over my head, what are the cliff notes here?
-AMPk = Cellular signaling pathway to boost your conditioning.
-mTOR = Cellular signaling pathway to boost your size and strength.
-Both need to be stimulated in optimal program design, although it’s counterproductive to try and stimulate both at once.
General vs. Specific Work Capacity
Work capacity is a term that is thrown around very often in the strength and conditioning world, but yet it is very often poorly defined.
Nearly every circuit or tri-set is passed off as a method that athletes will claim improves their “work capacity.”
Yet, what does this actually mean?
Are they saying this just because they are out of breath in comparison to their strength work?
Remember, the answer should always be specific – in that, what work capacity do you even need?
For the purposes of this article, I want to simplify things and separate work capacity into two main categories:
- General/systemic work capacity
- Specific/local work capacity
General/systemic work capacity is simply the ability to produce work over time. The modality of the work itself is irrelevant.
What is important here is general recovery – durability, energy substrate stores, cardiac output, and other general components of overall endurance that essentially provide the foundation for an athlete to train and compete for longer while recovering better.
Specific/local work capacity is different than this.
Specific/local work capacity is the athlete’s ability to perform very specific movements at a given frequency/repetition without an unacceptable level of performance decrease.
This, rather than being a systemic process, is highly tissue-specific and movement-specific.
Put another way, this is why you can play hockey for so long, but then begin to tire very quickly when playing sports such as basketball or tennis.
Your general/systemic work capacity is likely developed enough for those sports, but, your specific/local work capacity is not used to the movement demands of those sports and therefore you begin to tire much earlier playing those sports than you would hockey.
Improving your general work capacity is one of the many benefits you gain from taking a more well-rounded approach to your conditioning programming
More aerobic work leads to improved fat utilization during exercise, spares glucose for recovery, ensures a high percentage of glycogen is metabolized aerobically vs. anaerobically (creating less fatigue), and generally helps the athlete maintain alertness.
Every single hockey athlete can benefit from including GPP work in their offseason to support these general/systemic pathways for hockey performance optimization.
The problem is most athletes mistake GPP work as something that should only be left for the in-season and is a modality that involves high-intensity circuit training such as tire flips, weighted carries, choppers, and other forms of interval work that are very intense.
GPP at its fundamental definition is something that should represent an activity that is intentionally different as possible from hockey. GPP is your attempt to “round out” your hockey performance, and not further tax your recovery reserves.
Like mentioned previously when I gave you a window into my periodization, GPP work is done in the beginning of the offseason where specificity (specific/local work capacity) is at it’s absolute lowest in terms of what’s relevant right now.
We keep GPP work in there at a high-level to “round out” the hockey athlete and have him as prepared as possible going into his/her more specific SPP work. This creates the best of both worlds and creates real hockey performance gains.
Low-intensity GPP work can be incorporated into the in-season for those athletes who need it, this isn’t an issue at all.
But what I would recommend in these scenarios is that you accomplish this without taxing the same muscles and movement patterns that you see in skating so you’re not over-taxing yourself locally or running into repetitive use injury risk.
Put another way, stay off of those abominations that have you skate on a treadmill.
This is one of the least productive things you could do in the in-season, especially since very few understand how to combat the accompanying structural balance issues that come along for the ride with overuse of the SPP work.
Steady-state aerobic activity can increase your general/systemic work capacity at a very low fatigue/injury risk cost when you do it correctly – which in the end can have very obvious and major benefits for the hockey athlete.
Specific work capacity, on the other hand, is much more dialed-in.
Specific work capacity is defined on the tissue level or movement level; it is the ability of the hockey athlete to perform a sport-specific or task-specific movement over and over again with minimal performance decrease.
For example, for an Olympic lifter specific work capacity may in part be defined as the number of high quality clean and jerks that can be performed in a given period of time. For a hockey player, this could be slapshots or skating sprints.
These numbers could be improved almost exclusively by doing more clean and jerks (for the Olympic lifter) or more slapshots and skating sprints (for the hockey player).
This type of specific work for these athletes would improve their movement efficiency, optimize their muscle fiber recruitment, refine their technique, improve local capillary networks, and improve local mitochondrial density.
These are the adaptations that require the individual to perform the sport movement over and over again.
The further away you get from these exact motions, the less specific the workout becomes and the less carryover to specific work capacity on the ice you will have (but it is still retained to a certain extent because it’s not a binary choice between general or specific).
To provide an example for specificity, we’ll use lifting weights again due to the ease of understanding behind the examples.
If you wanted to improve your deadlift, nothing is going to be more specific than doing more deadlifts.
But, as you move down the food chain, Romanian deadlifts are going to pop up, tire flips will be further down the line than that, kettle swings further down the line than that, and hill sprints somewhere near the bottom.
These latter movements may help them improve specific work capacity as they are targeting the posterior chain (glutes/hams) very effectively, but they will have less translation to the deadlift than simply deadlifting.
This is how conditioning works as well and depending on where you’re at in your periodization, it should be a progressive yet integrated utilization of both GPP and SPP work to create the ultimate hockey athlete.
If I had to sum up general vs. specific work capacity in one thought, it would be:
Both general and specific work capacity are of major use to the hockey athlete.
When constructing offseason and in-season training programs, consider always incorporating accessory movement to build upon the overall potential of your specific fitness, but it is always important to keep some combination of both in play.
A final point I want to leave this section with is the immense importance behind building functional muscle tissue if your goals are to enhance lean mass while still becoming a better hockey player.
Meaning, I have found working with hundreds of hockey athletes that if you gain a bunch of lean mass without simultaneously utilizing conditioning methods in their programming then you can decrease their general work capacity significantly.
Those familiar with VO2 max measurements may understand that it is a measure of the body’s maximum oxygen utilization. This is represented by the true absolute peak of oxygen uptake, and therefore, aerobic performance.
The coaches out there who have an education in this stuff will also likely know that it is represented in ml/kg/min, or oxygen used per unit of body weight per unit of time.
Typically, there is an assumption that this is a function of your lean muscle mass – in other words, it is assumed that if you have two athletes of equal weight but one of them has a lower body fat percentage that he/she will be the one with the superior VO2 max.
This couldn’t be further from the truth.
Muscle mass is not all created equal in this regard.
For example, an endurance athlete’s legs are very well adapted and per unit of muscle mass are able to utilize a very high amount of oxygen.
Conversely, powerlifters legs are generally far less adapted in this area. Their oxygen utilization is significantly less, to the point of no comparison.
It would only take one assessment doing a VO2 max test between an endurance athlete and a powerlifter on a bike or treadmill to see the immediate differences.
What would happen to a hockey athlete if he/she engaged in an offseason of exclusive dedication to gaining mass and not including conditioning work?
The newfound muscle mass would be “dumb” in a way that it never developed in an environment that also demanded a high-level of conditioning output.
It has less capillary density, has a low level of mitochondrial density, and a low level of enzyme production.
It will very simply not maintain the same level of conditioning that your previous muscle mass had, this is why I mentioned that you need to create “functional” muscle mass – as muscle mass by itself doesn’t necessarily mean that it is going to be optimally functional for hockey unless you train it in a way that makes it so.
The hockey athlete who dedicates an offseason exclusively to mass at the expense of other work will notice a decrease in GPP (VO2 max, as body weight is increasing but oxygen utilized per unit of muscle mass is not), but also SPP as your local vascular networks or movement mechanics with this new muscle mass are not up to par.
It is therefore critical to the hockey athlete that they maintain some form of conditioning work into their programming during any strength or muscle hypertrophy phase.
This can be done through GPP work, SPP work, or creating a “hybrid” approach to training where you are doing your conditioning right along with your weight lifting in supersets, tri-sets, or giant sets.
Many options available here, none better than the rest without context.
Frequently Asked Questions About Hockey Work Capacity
I heard slide boards are the best training tool for hockey specific conditioning and power, do you agree?
I don’t think any single tool is “the best” as it all depends on the context of the athlete. However, slideboards can be beneficial if you use them correctly, check out this guide here for more information.
Optimal Mobility for Optimal Conditioning

Hockey mobility is something that has come up time and time again in my videos, blogs, and podcasts.
In fact, I even created an entire manual on hockey-specific mobility here that you can get for free.
It’s likely driven into you now that mobility is huge for overall athletic development and maximizing your hockey potential.
As a relatable example, just think about your class you grew up with when you were just a wee one.
The most unathletic guys were also the guys whose movement mechanics looked ridiculous. Zero flexibility and mobility leads to improper movement patterns and decreased speed + power output.
I can’t think of anybody in my life I trained or even grew up with that was even close to their athletic potential while still being tight and immobile. It doesn’t happen.
Sure, you can be strong while being tight, and a decent athlete perhaps. But in no way are you going to be reaching your potential if you’re tight.
The best athletes in the world are never walking around with the movement mechanics of the tinman.
When you’re tight, you can’t move properly. When you can’t move properly, that is the first domino that knocks over many dominos from a performance perspective.
It doesn’t just limit your range of motion.
Being tight limits your agility, starting speed, acceleration, top speed, conditioning, puck handling ability, high-velocity direction change, stretch/reflex potential and power potential – All major factors that need to be working in sync in order to have you perform at your best out on the ice.
Here are the two biggest reasons why I always hammer home the concept of the importance behind tightness:
- It goes highly unrecognized in training circles as a performance potentiator
- All hockey players are tight!
Far too often coaches will say to their hockey athletes:
“Just go do some stretches before or after the game”
or…
“Do some stretches after your workouts”.
Without giving any of their players any real advice or program structure to go from. “Do some stretches” for most hockey athletes usually just means that they are going to do the classic quad stretch, reach to their toes to do a hamstring stretch, and then if we’re lucky – we’ll see the entire team do the groin frog stretch out on the ice.
Really cutting edge stuff, right?
The questions then become…
What stretches should you be doing?
Where are hockey players tight?
Should I be doing static or dynamic stretches?
How often should I do it?
These things have to be addressed, and if they’re not, odds are nothing is going to improve or happen at all as I would consider mobility to be an independent roadblock to your success.
Meaning, you can have other aspects of your program design right on point, but, if you can’t move properly – it really doesn’t matter what else you’re doing.
Coaches aren’t the only one to blame though, oftentimes athletes write it off as well saying things such as “Stretching is boring” or “I’m just inflexible”.
Attitude shifts need to happen here for sure, and the reason why athletes normally have a poor attitude towards stretching is that I think they:
- Don’t realize the degree of impact this will have on their performance
- I think it’s pretty tough to get motivated about something if your coach never really gives you the true guidance like he/she would if it was your weight training program
Targeting and improving tightness is a way to improve performance without even changing anything else.
You could be training the same, eating the same, and executing everything else from whatever your routine is.
But, if you corrected your tightness, even though you’re essentially still the same person, you will perform better on the ice just because you will be able to move better.
Why would anybody not do this is a better question to ask.
Luckily for us, mobility work with hockey players is highly universal. The movement mechanics of the game are quite similar regardless of the position (except for goalies) which creates the same type of issues.
I feel 100% confident that the advice given in this section is going to help every single hockey player become more mobile because they all present similar issues.
Sometimes certain aspects of training or nutrition can be highly individual, but when it comes to tightness in hockey players you can be sure that the hips, achilles tendon/calves, vastus lateralis, hamstrings (biceps femoris) and shoulders are all a little, or, super tight.
Let’s break them each down one by one and discuss some potential options for you because once you maximize your mobility, you also maximize your movement mechanics – and once you maximize your movement mechanics, you maximize your energy efficiency.
If you remember from above, energy efficiency is one of the most important aspects you could ever improve when it comes to your conditioning levels.
This is why optimal mobility = optimal conditioning.
HIPS
If you look at a hockey player, he is bent over at the waist for pretty much the entire game. During a face-off, when taking a shot, when skating, and even sitting on the bench.
Then most people go home and either sit at the table, sit on the couch or sit at the computer.
All continuously creating a bent-over position at the waist in relation to the legs.
This shortens and tightens the hip flexors which can lead to a whole host of postural issues including pain in the hips during movement or weight training, tightness in the hips, rounded shoulders, shoulder impingements, low back lordosis and a forward lean in the neck.
Anybody who knows posture knows a healthy posture increases both your power output and reduces your susceptibility to injury.
Posture correction is very important.
These are issues that have to be addressed as soon as the offseason training begins because during the season it is tough to get the necessary work done.
With traveling, scheduling and injuries; the gym more often than not takes the back seat.
You can perform basic stretches at home which is a hell of a lot better than nothing but still isn’t optimal when compared to a complete training system.
Remember, proper resistance training can and should be increasing your flexibility as well. The whole idea that lifting weights is going to tighten you up overtime is only true if you train that way.
If you properly train like an athlete, it is going to actually play in your favor for mobility, among many other things.
In addition to the above, chronic bending over at the waist causes the pelvis to rotate forward, creating that low back lordosis (this will show itself a lot if you perform a barbell overhead squat) but can also affect the core muscles ability to fire properly.
Core strength is critical in transferring the power from your lower body to the upper body.
All power originates from the ground up and if your core is not up to par your ability to produce power takes a negative hit. This negative hit can come in the form of poor posture and tight hips.
Resistance Training Exercises To Alleviate Hip Tightness:
Split Squat Variations
Hip Thrust Variations
Lunge Variations
Dynamic Flexibility Exercises To Alleviate Hip Tightness:
Leg Swings
Cossack Squats
Hip Circles
A-Skips
Static Flexibility Routine To Alleviate Hip Tightness:
ACHILLES TENDON + CALVES
The very common tightness in hockey players within the Achilles tendon and the calves has mostly to do with skating mechanics vs running mechanics over the course of a competitive season.
When running you have a much greater ability to fully extend the foot (pointing the toe downwards) in a straight on movement.
Whereas in hockey on the ice the foot is sideways when taking strides and there is much less overall extension at the ankle, but still a ton of tension is being created through muscle contraction which can create tightness over time.
Just like always being bent over at the hips, the foot is always in that right-angle position as well. This is flexion on top of flexion.
This is one of the many reasons I believe it’s so important for hockey players to run in the offseason and not specialize too early with SPP work by trying to skate all of the time.
Running has a direct crossover to speed on the ice when performed properly and also helps to both alleviate tightness and drive structural balance in the quadriceps.
Structured running systems to achieve both your speed development and conditioning for the upcoming season is ideal during the summer for hockey players, more on these program design aspects later when we start talking about sprinting, plyometrics, and putting all of this stuff together.
With the Achilles tendon and calve tightness, it is an issue that seems to correct itself a little faster than the hips and is also much easier for the athletes to see and understand in their minds.
Correcting this issue is more or less just stretching out that area, whereas the hips have many deep, relatively unknown muscles that are very important although require most athletes to have an anatomy book nearby to fully grasp which muscles we are hitting/stretching.
Once this tightness is alleviated both your skating and running mechanics will improve (which will improve conditioning primarily) and so will your stride length (which will have a greater impact on your speed development).
Once these are improved you have a greater potential in trainability in these areas which is going to have direct impacts on your speed and agility.
As a side note, if you’re interested in maximizing your agility then you need to check out this free hockey agility training guide I wrote for you.
Resistance Training Exercises To Help Alleviate Calve + Achilles Tendon Tightness:
- Any form of calf exercise with a 2-4 second pause in the stretched position at the bottom of the movement.
- Allowing your knee to pass your toes during unilateral leg work. Examples: split squats and lunge variations. Yes, it is ok for the knee to pass the toe during these movements. But you must have good, controlled technique and your knee is only allowed to pass your toe if your front leg’s heel is still on the ground. If that heel creeps up, you need more mobility before you’re allowed to do this.
- Cossack squats
Dynamic Flexibility Exercises To Help Alleviate Calve + Achilles Tendon Tightness:
A and B-Skips
Jump Variations
Wall Glides
Static Flexibility Exercises To Help Alleviate Calve + Achilles Tendon Tightness:
- Calve/Achilles stair stretch
- Lean forward stretch
- Lean forward stretch with an object under the distal part of the foot
Self-Myofascial Release Techniques To Help Alleviate Calve + Achilles Tendon Tightness:
- Lacrosse ball on calf
- Foam roller on calf
HAMSTRINGS + QUADRICEPS
The biceps femoris muscle of the hamstring in combination with the vastus lateralis muscle in the quadriceps both get tightened for the same reasons, they are prime movers in the force generated during skating.
Starting to see the pattern?
Hockey players are always overusing one aspect of their body and always under using another aspect.
This leads to the structural imbalances and tightness that are so common in any unilateral sport.
Here’s why I have a big problem with a lot of “sport-specific” movements like weighted stick handling, fixed lateral resistance to mimic skating, artificial ice treadmills, among many other exercises that try to mimic the sport as much as possible.
When you specialize too soon and/or too often, you are often making the problem worse.
Overusing all of these muscles we are discussing during practice and games during the season and then going right into the offseason to overuse and tighten them up some more is not only a recipe for injury but also a recipe for lackluster results.
If you strengthen a muscle, it will be able to express that strength in all planes of motion. Meaning, you don’t need to have a resisted/weighted stick to strengthen your puck handling ability.
If you strengthen your rotator cuffs + upper body development through proper strength training, that puck handling ability is going to be enhanced.
Big lesson here – Do not overuse movement patterns or muscle groups year-round, you’re asking for problems. Especially in hockey.
Now back to the hamstring and quadriceps tightness.
Hamstrings control foot orientation and one of the biceps femoris’s main jobs is to point the foot outwards, which is the position hockey players feet are in whenever they are skating.
The vastus lateralis is that big muscle on the outside of your quad, its job to apply force down on the ice to propel you forward.
Both of these muscles get overused during hockey which leads to them both becoming tight as a rock.
Just take a look at your legs. If you’re a hockey player, odds are the outside of your thigh is far more developed than the inside of your thigh. That outside of your thigh is also probably rock hard to the touch if you haven’t addressed tightness directly in the past either.
Most hockey players when it comes time for the offseason have biceps femoris and vastus lateralis muscles that resemble steel rods.
Way too tight in order to function properly and is something that we have to address immediately in order to improve speed and conditioning over the offseason.
An important thing to note is that the vastus lateralis connects to the knee and when it tightens up bad it is also more susceptible to bring the knee out of place.
Think about it like this, the vastus lateralis is so tight it is pulling the knee out diagonally towards it. This can cause not just acute injury, but long-term career ending injury.
Resistance Training Exercises To Help Alleviate Hamstring Tightness:
Romanian Deadlift Variations
Good Mornings
Cossack Squats
Resistance Training Exercises To Help Alleviate Quadricep Tightness:
Bulgarian Split Squat Variations
Lunge Variations
Dynamic Flexibility Exercises To Help Alleviate Hamstring/Quadricep Tightness:
Straight Leg Bounds
High Knee Skips
Static flexibility exercises to help alleviate hamstring tightness:
- PNF stretching
- Single/double leg toe reach (standing or seated)
- Step up stretch
- Iso-hold split squat variations
Static flexibility exercises to help alleviate quadriceps tightness:
- Standing or lying quad stretch
- Iso-hold split squat variations
Self-Myofascial release exercises to alleviate hamstring tightness:
- Foam roller on hamstring
- Lacrosse ball on hamstring
Self-Myofascial release techniques to alleviate quadriceps tightness:
- Foam roller on quadriceps
- Foam roller on IT band
- Lacrosse ball on IT band
SHOULDERS
Last but not least, the infamous rounded shoulder posture.
When you’re standing in a relaxed position, your shoulders shouldn’t be pulled forward.
This is a good indication you are either far too tight or have overdone chest work in relation to upper back work.
To be quite honest, younger guys are the worst offenders for this. It’s not their fault, it’s usually just a case of not having professional guidance in the early stages of their weightlifting programming.
What do they do?
Bench press plus maybe some arm and ab work for the first couple years of lifting, just because that’s all they know at the time.
But in reality, back exercises should outweigh chest exercises with a 2:1 ratio until this is corrected.
Meaning, if you have bench press in a workout, then you should be balancing this out with both chin-ups and face pulls in order to maintain postural integrity (2 back exercises to 1).
And this doesn’t just represent back exercises in general, but back exercises that focus on the upper back and scapula retraction.
Doing this will not only improve their structural balance, injury prevention, and posture, but will also help with that bench press power that they are after.
Let’s face it, all guys ask, “How much you bench?” but very few know how large of a role the back plays in bench press development.
Your back is the foundation at which you press from, the wider your back, the wider your foundation.
In a relaxed standing position, your shoulders should be at your side. Not in front of you.
Also, in a relaxed position they should be symmetrical in height. One should not be higher or lower than the other. This type of tightness usually results in a forward head lean as well.
What you end up with if you don’t correct these issues is a caveman stance.
Palms pointed backwards, shoulder curled in forwards, forward head lean, and a posture that screams “Hey look at me, I’m jacked” – when in reality you really just look like a caveman and nothing about your posture right now is screaming “I know how to train for hockey”.
Addressing shoulder tightness with hockey players is extremely important for puck handling ability, shot power and shot accuracy.
The internal and external rotator muscles work together to create a lot of this motion and hockey players normally have a bigger issue with their external rotators and specifically their scapula retractors.
Additionally, our nervous systems are structured in a manner where the faster your arms are pumping, the faster your legs will be pumping as well.
The mobility in your upper back plays a large role in the stretch/reflex potential for your upper body to contribute to your top speed.
Resistance Training Exercises To Help Alleviate Tightness In The Shoulders:
DB Power Cleans
Cuban Press Variations
Face Pulls
Dynamic Flexibility Exercises To Help Alleviate Tightness In The Shoulders:
Arm Circles
Arm Swings
Scapula Floor Slides
Static flexibility exercises to help alleviate tightness in the shoulders:
- Lying, manual internal rotator cuff stretch
- Posterior shoulder stretch
- Anterior shoulder stretch
Self-Myofascial release techniques to help alleviate tightness in the shoulders:
- Lacrosse ball in the deep part of the shoulder
- Foam roller on upper back
Now that we have gone over all of the main tightness areas that effect hockey players and their performance it’s important to note a few things.
#1) Tightness in anywhere on the body can affect completely different muscles separate from the origin of the problem.
For example, ankle flexibility effects the cores ability to properly fire and transmit maximal amount of power.
Many people only think locally when it comes to injuries/tightness, but other areas of the body always pay for it.
If you can’t reach triple extension at the knee, ankle and hip during a stride due to immobility in the ankle, the core’s power potential will suffer every time.
#2) Manual therapy is always a great option. By manual therapy I mean professionals who perform either Active Release Therapy (ART), Fascial Stretch Therapy (FST), or Massage Therapy.
Having somebody work on you is always ideal and will always be my #1 recommendation. If you have access to this in your community, do it. It’s the fast-track to success as far as mobility goes.
#3) Static stretching, dynamic flexibility routines, and strength training all done properly can alleviate much of the tightness symptoms and in some people will alleviate all symptoms.
But, the most powerful combination is those three in combination with either self-myofascial work or professional therapy.
To play to your absolute best potential and become the fastest, most conditioned hockey player you can be, tightness’ have to be addressed. No way around it.
Frequently Asked Questions About Hockey Mobility
That was a lot of exercises, how do I know which ones to do and how many reps?
Check out our Hockey Hip Fix program and our Hockey Yoga program as they are easy-to-follow routines that were built by myself to give you hockey-specific results.
Using Plyometrics for Hockey Conditioning

A plyometric movement consists of an exercise where there is a quick stretching action of the muscle, followed up immediately by an explosive shortening action of the muscle.
The stretch is the eccentric phase of the movement, and the shorten is the concentric phase of the movement.
Plyometrics purposefully precede the movement with a stretch because it enhances the acceleration and power output of the explosive contraction – it is exactly this reason why plyometrics are so valuable towards both hockey speed and hockey conditioning training.
You perform a plyometric movement in an attempt to move your limbs or an object attached to your limbs in an intended direction at max velocities. Common examples of plyometric work include sprints, jump variations, agility work, hitting, throwing, and swinging.
Basically, anything that is going to have a “rebound” effect and is moved with all-out velocity is something you can consider having plyometric value.
Plyometrics provide two main benefits for hockey players that must never be undervalued:
- Plyometric training increases the amount of potential energy in your tendons
- Plyometrics increase your stretch reflex capability
To address #1 with an example, let’s use the vertical jump.
You start the vertical jump movement by quickly descending into a half or quarter-squat position.
As this process occurs, your muscles will load more energy through the stretching motion along with the increased storage of energy in the tendons attaching to those same muscles.
After the period of stretching ceases and you begin to transition into acceleration upwards, all of this stored energy at the muscle-tendon junctions will be released and you will have much more speed and power out of the whole in comparison to if you did not quickly descend.
What does this mean?
More speed and power for hockey athletes – and it is a highly trainable quality as well that can be improved upon over time.
Moving on to #2, muscles have a natural built-in Stretch Shortening Cycle (SSC) that is known as the stretch reflex – essentially, this gives you greater elasticity in the muscle when performing a movement.
What happens here is actually a protective mechanism, when you lengthen a muscle very quickly (for example, again, lowering down before a vertical jump) to body ‘senses’ that you are lengthening a muscle very quickly and the body/brain don’t want you to tear that muscle.
So, the brain/nervous system allows you to maximally contract more muscle fibers in the lengthened position so that you are now stronger coming out of the hole than you otherwise would be.
This reflex has been demonstrated within the literature to be responsible for a lot of the force and speed generated at very high velocities – and has also been strongly linked to sprint performance, acceleration, and top speeds.
This sounds impressive, and it is.
But it also makes complete sense when you break down what plyometric work can do for athletes simply from a muscle physiology perspective:
- Plyometrics directly improve speed of muscle contraction
- They help convert the strength you have gained in the gym to usable strength/power out on the ice (essentially, converting what I call “Gym Strength” into “Hockey Strength”)
- You can make plyometrics highly sport specific to hockey
- They strongly support ankle stability in athletes, which is major for hockey athletes in particular due to the above-mentioned ankle issues hockey athletes have
- They teach you how to decelerate as much as they teach you how to accelerate – two equally important components towards building real agility
- They force you to develop higher levels of co-ordination
- They also train the nervous system to be able to contract muscle fibers more rapidly and repeatedly (repeatedly being key for conditioning)
Plyometrics are a way for hockey players to add in exercises that will have a direct carryover to their speed and conditioning development while also creating a way to further develop specific skills.
The idea here is to incorporate movements with much less weight than you would normally encounter in the gym but perform them at all-out velocities to build power and speed.
This type of training teaches the body how to generate force faster and express it faster than it has been taught before.
If you read the section on general vs. specific work capacity, this is a transitioning block between what’s functional muscle tissue and what is non-functional muscle tissue.
The entire philosophy here is to convert the strength and power you have into actual usable speed out on the ice.
It’s all good and well if you’re strong, but if you’re not able to express that strength out on the ice then it is completely pointless.
When you’re programming plyometric work into your training systems, it is most easily broken down into two different categories; high-frequency plyometrics and low-frequency plyometrics.
High-Frequency Plyometric Drills
- Stutter step drills
- Low box jumps for multiple reps
- Lower body “Up, up, down, down’s”
- Jump rope
- Hurdle hopping for time
- Lateral hopping for time
- Vertical jumping for time
- Cone drills
Low-Frequency Plyometric Drills
- Box jumps
- Broad jumps
- Skater bounds
- Sprints
- Jump variations (tuck jumps, pike jumps, single leg, etc)
- Depth jumps
- Reactive agility work
This is not an exhaustive list of the plyometric drills we use here a Hockey Training as that list would be very extensive – the main thing I am pointing out here is that your “high frequency” drills are the ones that get you into “excitation” mode.
High frequency involves many smaller efforts performed as fast as humanly possible, whereas the lower frequency drills are the ones that contain a very few number of reps (sometimes only 1 per set) due to the high degree of effort and explosiveness applied during each effort.
They are still frequent, just not as frequent as the high-frequency versions.
What I have found through both the scientific literature and my experience coaching so many hockey players is that your low-frequency drills are excellent for developing more explosive speed, whereas your higher frequency drills tend to be more appropriate for agility and conditioning.
I’ll mention there is major carryover between all three of these, but when you get down to the nitty-gritty of specific training, that’s how it breaks down.
I find categorizing the plyometric drills into LF and HF lists allows both myself and my coaching students to better organize and plan out a full periodization system properly.
That might be one of the most common errors I see when athletes or coaches ask me to critique their program – their workouts look like a bunch of speed and conditioning “exercises”, but the sequence that they put them in together in a workout or over the course of a phase doesn’t make sense.
This is important because program sequencing is everything when it comes to improving the performance of hockey athletes.
Beyond this, categorizing them into different lists also allows you to better understand what type of stretch reflex you are applying upon the body.
For example, high-frequency plyometric exercises will increase the rate of velocity during the stretch component of the movement, whereas low-frequency movements increase the magnitude of the stretch.
LF allows you to create more force, HF allows you to express that force faster. You need both.
It’s also important to point out that plyometric work is not just reserved for the lower body, and that proper hockey speed and conditioning training needs to encompass both the upper and lower body.
For the upper body, I am a major fan of medicine ball work for hockey athletes and have seen a tremendous carryover from that type of training into improve strength, power, conditioning, and speed out on the ice.
For the upper body, I most commonly stick to plyometric push-up variations, lots of band work, plyometric pull up variations, and lots of medicine ball work.
At the end of the day, plyometric exercises are a must for building hockey conditioning (and overall hockey performance for that matter) and the way in which you can progress their difficulty in order to keep proving new stimuli would include:
- Increasing the resistance (for example, a heavier medicine ball)
- Increase the range of motion (for example, a higher box jump)
- Increasing the speed of movement (HF vs. LF)
Then, once your degree of difficulty has been influenced by one of the above three factors, you could decrease your rest periods over time to ensure this has an effect on your conditioning levels (via the ratio of ATP vs. AMP) as opposed to just strength development.
Frequently Asked Questions About Plyometrics For Hockey
Aren’t plyometrics high-impact? Do we have to work our way up to utilizing them?
For the most part, yes, you will need to work your way up as I believe you should have a base level of strength before you’re able to handle these forces.
However, if you look at the list of drills above you will be able to find some that are relatively low impact.
This section was fascinating, do you have any more resources on plyometric training for hockey?
Yes, we have a full podcast episode on it here for you to check out.
Using Sprint Variations for Hockey Conditioning
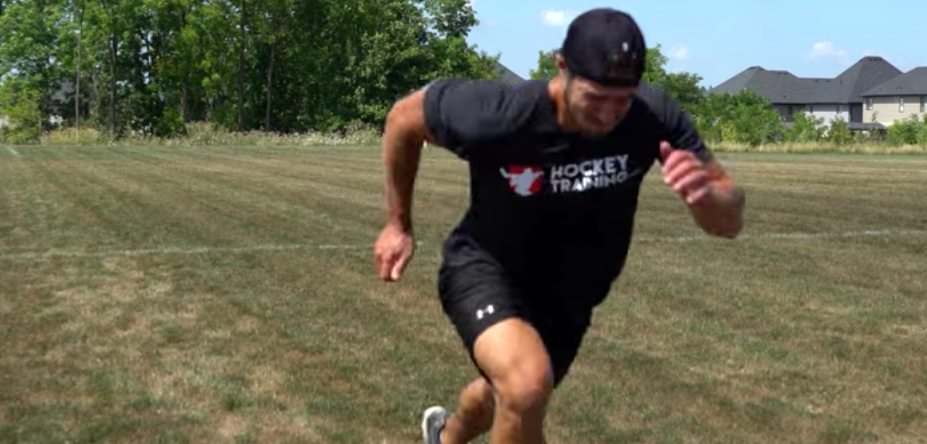
Sprinting sometimes gets called into questions of whether or not hockey athletes should be doing it or not – I’m here to tell you (and hopefully you already gathered from the above information) that sprinting is an absolute must for hockey performance.
I think some athletes and parents know it’s a “good workout” but they aren’t sure if it translates over into on-ice speed and conditioning, it absolutely does and is one my “non-negotiables” when it comes to offseason programming.
If you’re going to work with me, you’re going to sprint. Period.
Some coaches have a lack of confidence in sprinting because they feel that due to the different movement mechanics that occur with sprinting vs. skating that there won’t be a carryover, and instead, you must train laterally in order to improve speed development.
Wrong. A combination of both is far superior to either alone. Again, GPP vs. SPP.
Hockey athletes should be sprinting in the offseason to improve their speed, conditioning, and agility on the ice for three main reasons:
- Force production
- Structural balance
- Sport-specific energy system demand
Force Production
There are very few exercises out there that create the sheer force production that maximal sprinting creates.
When sprinting at top speed levels, the forces coming down on your feet can equate to 5-6x your total body weight per stride.
This is a lot if you consider the average 200lbs man may be creating ground reaction forces of 1000-1200 lbs per stride.
Now take that number and multiply it by how many strides you take within a single sprint workout – the numbers start to get staggering.
What does this mean for you as an athlete?
Well, first off it means you should definitely warm-up prior to sprinting. Without a proper warm-up, receiving these types of forces can quickly lead to some injury issues.
A pre-sprint warm-up should always include some dynamic work + some build-up sprints.
Secondly, sprinting with proper progressive sprinting variations can over time improve your body’s force production capability which will have a carryover to your speed and conditioning out on the ice.
Greater relative force production capabilities in the muscles responsible for sport-specific movement mechanics will improve speed potential whether you’re on the ground or on the ice.
One of the biggest reasons why sprinting speed can and will carry over to your skating speed is because this improved relative force production is going to improve your stride length potential.
I’ve talked about this in depth throughout many projects before, most notably my recent monster article on everything to do with “How to Train for Hockey Speed”.
But to recap, the two biggest factors that come into play when improving an athlete’s speed are stride length and stride frequency.
Stride length is the total amount of distance covered per stride, whereas stride frequency is the total amount of strides taken per unit of distance.
One of these is much more trainable than the other once an athlete has exited his youth years, and that is stride length.
Stride length is the much more trainable quality that we can improve in our hockey athletes in order to improve their speed on the ice.
An effective way to do this is with a properly executed sprinting program in the offseason.
Increase relative force production = increase stride length potential.
Total speed development, of course, contains several other aspects including total body relative strength, mobility, mental agility, power, body composition, and stride length vs. stride frequency but increasing force production through sprints checks a few of these off.
Some of you might be thinking “This covers speed, not conditioning”
In a way, yes it does.
But when you improve speed you indirectly improve conditioning through the backdoor by way of a principle known as “Speed Reserve” – essentially, the faster you are, the less hard you will have to work in order to keep up with your slower opponents.
So even if they are more conditioned than you, you are still ahead of them because their 100% is your 70%.
Structural Balance
This is an area of offseason development so many coaches get completely backward.
The offseason should be about restoring balance to the body to improve performance and reduce injury, not creating even worse imbalances.
An important thing to understand is that too many athletes and coaches overuse this lateral motion trying to mimic the skating movement pattern; using slide boards, bands, and false ice tactics.
This is a big reason why so many hockey players have knee, groin, and hip pain, too much repetitive motion during the season and then continuing it trying to add resistance in the offseason.
Think about it like this, a computer worker doesn’t get carpal tunnel syndrome or lots of inflammation in their wrists because typing is such a high-intensity task. They get it because of too much repetitive motion.
The same goes for hockey players. If you mimic this motion all the time you are going to run into knee/hip issues or knee/hip inflammation. Not because the movement pattern is “bad”, but because you do it so often.
You can only stress a certain area through the same movement mechanics so much before it will start to fight back (or break down).
Structural balance in reference to hockey players mainly resides within the lower body and when it comes to overdoing this repetitive motion you can create an overdeveloped vastus lateralis in comparison to the vastus medialis.
This is because of all of this lateral motion, you’re heavily training and loading up the lateralis all the time while neglecting other important musculature within the quadriceps.
This throws off structural balance which throws off mobility – like mentioned above in the mobility section. Small little things like this create a ripple effect on your entire performance.
We don’t want to encourage this motion any more than we need to, it will only create more problems and deeper structural balance issues that you will have to dig your way out of.
The imbalance will only become compounded if you focus your attention on these too often within your programming and neglect the much needed GPP and structural balance work.
Knowing this, hockey players need to have a heavy focus in the off-season on developing the vastus medialis oblique and hamstrings with the time that they have before they are back into playing again.
Developing these muscles is going to create a more balanced musculature which will convert into a greater ability to be faster and prevent injury.
Sprinting helps this process along as it is not a lateral movement.
When thinking movement mechanics and imagining what I’m talking about here, picture where your toes are when you’re skating forward.
They point out slightly to the side as you press your blades into the ice and explode from there, this “toes pointed out” motion is what is creating the imbalance within the lateralis.
Sprinting, on the other hand, is much more forward, I don’t know anybody who runs like they skate. Except ducks I guess.
When running the toes are pointing forward which recruits much more medialis and hamstring into the movement while still not totally neglecting the lateralis.
The differential in muscle recruitment pattern in combination with its force production capabilities is giving us a lot of reasons to start sprinting so far.
If you increase the athlete’s ability to create force, it will enable him to transfer into a great stride length.
Sprinting is one of the most explosive things an athlete can do and when you increase their sprinting speed, you will also be increasing their skating speed.
Sport Specific Energy System Demand
There are major differences from sport to sport in what energy systems need to be developed in order for you to become maximally conditioned for that specific sport.
Like mentioned in the beginning of this project, hockey is primarily an alactic-aerobic sport.
Meaning, it is a game that is played with short, high-intensity explosive efforts interspersed by low-intensity activity.
An example of this can be drawn from skating as fast as you possibly can down the ice, taking a slap shot and scoring.
Followed up by slowly returning back to your bench or to center ice for a face-off.
Alactic (high-intensity breakaway + shot) + Aerobic (slowly skating back to center ice or the bench).
Another equally entertaining example of hockey’s alactic-aerobic nature would be getting in a fight and then going to the box.
This is why a well-rounded approach to hockey conditioning is so important.
A hockey athlete has to first have a well-developed aerobic base (heart rate of less than 60bpm) before directing their conditioning workouts towards alactic power and alactic capacity efforts.
This will have much more carryover to the game than continuing to work on aerobic work or incorporating too much lactic work.
Hockey athletes are complete athletes and should be trained as such. It’s not as simple as a one-size-fits-all energy system work.
Sprinting is about as alactic as it possibly gets and through different training modalities, you will be able to train both alactic power and alactic capacity in your hockey programming.
So not only will you be improving your force production and structural balance, but you will also be appropriately benefiting your sport-specific energy system development for enhanced conditioning.
Sprinting is a real no-brainer in my mind and something that I have seen benefit so many hockey players time and time again.
Here are a couple of example sprint-focused workouts to try out:
Alactic Power Sprint Training (this would be a piece of a speed session)
A: Falling sprints for 15 yds x 5 with 2 mins rest between sprints
8 mins required rest between exercises
B: Double broad jump x 5 with 3 mins rest between double jumps
Alactic Capacity Sprint Training (this would be a piece of a conditioning session)
A: Maximum effort cycling: 5 x 15 secs with 45 secs rest between efforts
No required rest between exercises
B: 3-point stance sprinting: 5 x 30 yds with 75 secs rest between efforts
A final note that I would like to make here on the topic of sprinting for hockey performance is the importance of varying up your starting sprint stance to create different effects.
For example…
Three-point stance sprint – Basic and doable for all athletes and is one of the best ways to incorporate sprinting into your program for the first time.
Half-kneeling start sprints – Forces further structural balance by making you use a different leg each set as your “take off” leg. Over time this reduces your need to always load up on one side and improves your agility.
Mountain climber sprints – Allows you to create a plyometric effect right off the start due to the stance switch as you explode into a sprint.
Laydown turn around sprints – Allows you to incorporate reactive agility into your speed and/or conditioning workout so you gain a more well-rounded effect.
The examples could go on and on.
Just like you would see different exercises being performed in the weight room, you should be performing different sprint variations to continue to provide the body with different stimuli to adapt and progress from.
Frequently Asked Questions About Sprinting For Hockey Training
Are you a fan of hill sprints or stair sprints for hockey conditioning?
Yes! I would make them mandatory if all of my followers lived near hills or stairs that were long enough. If you have a hill, click here. If you have a long set of stairs, click here.
Using Tempo Runs for Hockey Conditioning
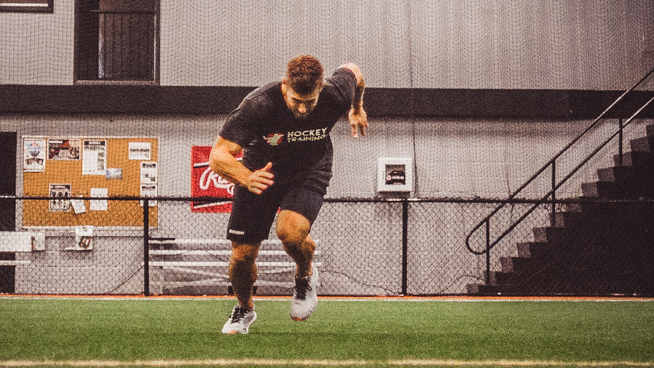
For hockey athletes, I feel tempo runs are the smartest option here to improve your aerobic development to ultimately reach your aerobic base.
I won’t get into the finer details of why hockey athletes need to be aerobically fit in this section as I feel I have already covered that in great detail above. Here, let’s just talk about the “how” because you already know the “why”.
Your target aerobic base measure should be to have a heart rate of 60bpm or less. Although this isn’t an exact science, resting heart rate provides a very unique and valid insight towards your overall aerobic conditioning.
Tempo runs are the elite athlete’s version of aerobic training and it is essentially interval training but done at a controlled aerobic output.
They serve as a great aerobic capacity development tool, as well as helping speed recovery by creating a flushing of the muscles with new blood and nutrients.
Tempo runs are also generally not very fatiguing for the nervous system – so they can be something that is performed even on deload weeks as a form of active rest if you are in need of developing your aerobic base sooner than later.
While tempo runs are great to support aerobic development, fat burn and speed recovery; they must also be done in a controlled manner within certain parameters to ensure the correct energy systems are being used. It’s a lot more than just “running” – a controlled dose equals a controlled response.
How it works is you perform intervals of 60-75% of your maximal exertion speed.
If you have low fitness levels or are brand new to this, stick to the lower end of the percentages to begin with and work from there.
Performing it in this manner allows you to tap into your aerobic capacity energy system development while still allowing full recovery in between runs so that you do not reach a level of lactate threshold.
WHAT YOU WILL NEED:
- Stopwatch
- A known distance
- Heart rate monitor (Not necessary but helps.)
RUNNER A
- Maximum sprint speed for 100m: 13 secs
- 75% of maximum sprint speed = 13 / 0.75 = Roughly 17 secs
- Runner A would run at a pace to hit 100m in 17secs each tempo run he performed
- Rest 45-75 seconds in between runs, if not fully rested, rest a little more
- If you feel the onset of lactic acid building up, slow down, that’s not the goal here
- Runner A would perform 2 sets of 5, 60 yd runs as a standard tempo run workout resting 45-75 secs in between runs and 3-5 mins in between sets.
HERE’S WHAT A WORKOUT LOOKS LIKE ON PAPER:
Performing 2×5 60yd runs
60yd run at 75%
Rest 45-75s
60yd run at 75%
Rest 45-75s
60yd run at 75%
Rest 45-75s
60yd run at 75%
Rest 45-75s
60yd run at 75%
REST 3-5mins between sets. Get to full recovery here.
60yd run at 75%
Rest 45-75s
60yd run at 75%
Rest 45-75s
60yd run at 75%
Rest 45-75s
60yd run at 75%
Rest 45-75s
60yd run at 75%
The above is a great way in which to approach your aerobic development.
Over time adjust accordingly and increase the difficulty as needed to continue the development of your aerobic system.
Although I prefer tempo runs, you can really do this with any “cardio” equipment you want.
Elliptical, swimming, bike, stair climber, rower…it all fits well.
The poison is always in the dose when it comes to aerobic work.
Way too much aerobic work is a dumb thing to do. In a similar vein, too little aerobic work is also a dumb thing to do.
Hockey athletes gain the greatest conditioning by utilizing both ends of the training spectrum and finding that balance.
This balance begins with developing an aerobic base.
Frequently Asked Questions About Hockey Tempo Runs
I tried your workout and I didn’t really have a burning feeling in my legs and I wasn’t out of breath that much, should I decrease my rest periods or increase my distance covered?
Absolutely not. In order to stimulate an aerobic training adaptation we need to keep things low intensity. There is a point of diminishing returns here, if you “feel the burn” too much then you are entering a lactic state and exiting an aerobic state.
Using Hockey Conditioning for Sport Specific Fat Loss
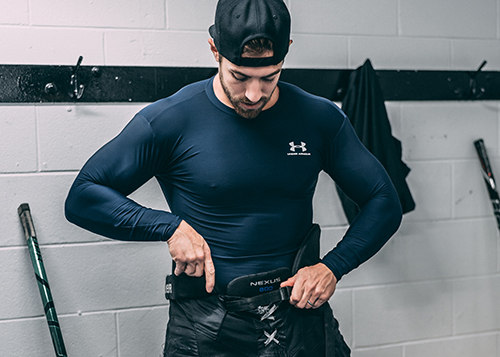
When it comes to using your conditioning workouts for fat loss purposes, I am a big fan of this. The reason is that I like my hockey athletes to be burning their fat off as opposed to starving their fat off.
Too often people resort to eating such a small amount of food that they either:
- Lose muscle along with their fat loss
or - Create a huge rebound effect because their approach was unsustainable
But, normally it’s a combination of both, and since losing muscle and getting fatter isn’t exactly a good strategy in order to improve our conditioning levels – it’s a good idea to follow a good diet approach that feeds your metabolism instead of starves it, while simultaneously doing some conditioning work that will create an overall great effect on fat loss but still allow you to gain a hockey-specific performance adaptation.
Your first and most simple choice is to add in an extra tempo run session in per week. This is a very simple and yet very effective approach.
If you do this, it will not offset your training or recovery capacity to any significant degree, but the additional calories burned will play a good role in some additional fat loss.
Your second choice is to incorporate some interval training into your current routine.
As you know by reading this far, I’m a big fan of both HIIT (High-Intensity Interval Training) and LISS (Low-Intensity Steady State) training. Context is always everything.
Some people say HIIT performed in a fasted state is silly, because fat oxidation rates are much lower during HIIT exercise.
Well, while it’s true that fat oxidation rates decline as cardio intensity increases (as glycogen then becomes the fuel of choice), there’s more to consider here when discussing overall fat loss benefits.
- Research shows that as you continue to perform regular high-intensity interval cardio sessions, your muscles learn to use less glycogen during workouts (thus increasing fat oxidation rates during the workouts), and your muscle cells also get better and better at oxidizing fats
- This previous point is particularly important to fasted training as, over time, HIIT increases the total amount of fatty acids your body is able to metabolize during workouts, pretty strange this gets so routinely overlooked
- Plenty of evidence shows that the post-exercise afterburn effect (also known as EPOC, where you continue to burn calories even after the workout is over to support recovery needs) is greater with HIIT than with LISS cardio (about double when you look at the data: 13 percent vs. 7 percent)
- Research shows that high-intensity interval cardio is particularly good for getting rid of visceral fat, which is highly inflammatory and dangerous to have within our physiology
- HIIT has been demonstrated more than once to create an effective appetite suppression effect, this is great if you’re dieting
Given all the above, you can see once again why context and specificity matter the most. Anything and everything has a cost-benefit analysis, and it’s up to the coach and/or athlete to make the best decisions.
But, here is a method I have used time and time again to create quick fat loss results for my hockey athletes, and it’s the classic 1-Minute on, 1-Minute off routine.
Benefits: Lactic development for sports performance, improve insulin sensitivity, create large amounts of fat loss, improve overall fitness.
Who is this for? Beginner or advanced hockey athletes, it works for everyone.
This is a quick 20-minute workout that is most appropriate for people who want to ease into their interval work in a more progressive manner (which is one of the reasons why it’s so good for fat loss).
It builds hockey athletes conditioning up and is also great to teach them how to really push themselves, because in many cases they are disconnected from what they are capable of.
How do I do it: This workout can be performed on any cardio machine or outside, but it’s best to start off with the bike if you are working with a novice trainee who still needs to build themselves up.
Once they are intermediate or advanced, you can do this wherever.
It’s also great to add to any strength training protocol because it won’t leave you completely exhausted as some other conditioning methods do.
- Start with a 5 minute warm up
- Add resistance to your cardio machine and start the intervals
- Work intervals are designed to go “hard” for one minute, but don’t go all out. You should feel like you’ve got just a tiny bit more if you needed that extra push
- Rest intervals last 1-minue and should be active, keep moving, just a lot slower.
- For people who are brand new, complete this 1-on-1-off cycle three times, and perform this 2-3x per week
- When you are ready to accumulate, the progression would look like this:
- Week 1: Two workouts of 3 x 1-on-1-off
- Week 2: Three workouts of 3 x 1-on-1-off
- Week 3: Three workouts of 4 x 1-on-1-off
- Week 4: Deload completely off HIIT training
Another variation of this workout demonstrated to be equally as effective is to do 5 intervals of 2 minutes at a high intensity interspersed with 2 minutes rest in between “hard” rounds.
Although it’s best to only stick with one protocol per phase, you can use this to add variation for a future phase and still target fat loss and hockey conditioning in a proven and effective manner.
One last note on this section that is important to point out is the fact that this is primarily a lactic-based conditioning program. And if you recall, hockey athletes are alactic-aerobic – meaning, this approach would not be considered SPP, it would be considered GPP.
When a hockey athlete isn’t lean, it’s the #1 thing you should focus on first that will have an immediate and powerful impact on their conditioning levels because being overweight trumps anything else that you’re trying to accomplish.
So, when we look at the cost-benefit analysis, even though this is a lactic approach (which isn’t at the top of the chain for hockey specificity) it still wins the cost-benefit analysis because it is the most effective for fat loss, and fat loss is what is going to bring the best conditioning results right now.
We can focus on alactic work later.
But if you need to get lean, no faster way you’re going to do it than a combination of tempo work plus the above HIIT protocol, I can promise you that.
Frequently Asked Questions About Fat Loss For Hockey Players
Do you have a hockey diet I can follow to get leaner?
Yes, if you haven’t already checked out my free nutrition guide then you can get access to it here.
I think I need to learn more about fat loss to get better esults, I’ve been at a plateau for a long time. Do you have any advanced resources?
If you’re looking for more then I would suggest you implement the strategies seen here and here.
The Top Three Conditioning Mistakes That Are Holding You Back

#1: Doing “Cardio”
I know this sounds pretty weird since you just read a books worth of information of how to use cardio for hockey specific conditioning but hear me out.
I’m not saying cardio is bad, but I am saying that “cardio” is not a representation of sport-specific hockey conditioning. Way too often are athletes told by their coaches to just go do “cardio”, when the science of hockey conditioning is wildly more complex than just going for a run outside until you get tired.
Blindly following this advice is probably the most common mistake I see out of all four of the mistakes I’m articulating in this section.
The best conditioning plan is the plan that meets the needs of the specific athlete, and also meets the needs of the specific sport.
That’s a two-step process that no generic “cardio” prescription could ever offer you.
That’s why this project has been so lengthy and detailed, if it was just “go skate” I wouldn’t need to write about all of this stuff – and you would also see a lot more conditioned athletes out there.
But you don’t, because this advice doesn’t work.
Think about practice.
At practice you will develop your skills, bring up the ones you suck at and maximize the skills you’re already best at. The most efficient way to improve your conditioning is to follow this exact same philosophy. This means:
- Don’t just copy a pro hockey players workout routine
- Don’t just copy an exercise you saw a pro hockey player do and say, “well he/she does it, so it must be good!”
- Don’t just copy a workout found in a magazine
- Don’t just take a generic, umbrella statement from your coach as gospel
If he/she says, “do some cardio” …you still have more research to do.
Bring up your weaknesses, maintain your strengths. Don’t follow generic statements and make sure that what you’re doing can be translating to real hockey performance.
#2: Falling For The “Functional Movement” Fad
When you’re looking at how the hockey industry got swept up by functional training, it’s tough to exactly determine how it all unfolded.
But, in any case, it has spread through the industry like wildfire.
Plenty of hockey teams and weight rooms are going as far as restructuring their entire gym to include stability balls instead of benches, and wobble boards instead of squat racks.
Lets also not forget to include an area for discs, Bosu’s, and anything else that makes your hands shoot out gang symbols during your working sets.
These functional coaches place a sky-scraping premium on the smallest details of movement above all else and often deconstruct the simplest of exercises into a dozen different progression models, half of the time including some sort of balance device along the way so you can “engage your core” when you move.
Watching some of these exercises and workouts, it’s difficult to differentiate if they’re training for hockey, or want to join the Cirque de Soleil.
I’m not going to dive too far into the scientific intricacies of this inaccurate approach to hockey training as I have done so both here and here.
Because honestly, I think the previous giant explanations I have done weren’t necessary for you to see how this type of training methodology leaves A LOT to be desired when it comes to creating improvements in hockey performance.
While focusing on controlling your movement and stability throughout ranges of motion is important and should be a part of all programs, a problem happens when you get so caught up in these small details that you lose sight of the big picture of what hockey performance truly is.
I think people are starting to understand the major flaws here though, as it seems to have lost steam over the past few years (hopefully due in part to my relentless pursuit of promoting real sport-specific training).
It’s not complicated to comprehend that utilizing methods that are born out of physical therapy and injury rehab do not offer the best ways in which we can improve our performance.
Physical therapy and performance enhancement are two different schools of education for a reason, if you’d like to ride a dolphin in your spare time then it’s probably wise to hang out on a Bosu ball to “activate your core” to balance yourself in unstable and unpredictable environments.
But, if you would rather train to improve your hockey performance then you need to train like an athlete. Not a patient going through physical rehab.
Keep in mind, the true essence of functional training should be that everything you do has translation to improving your overall performance as a hockey athlete.
The idea that training is only “functional” if it’s done on an unstable surface or on one leg is downright silly and incorrect. You absolutely cannot judge an exercise as “functional” or “non-functional” based solely on it meeting some arbitrary unproven criteria.
Not to mention, there is literally zero research demonstrating that performing these exercises reduces your risk for future injuries during a hockey game.
If you’re serious about your hockey performance, you have to start training like it.
Improving performance and reducing injury risk comes down to an overall training strategy and programming schedule that works within your limits of work capacity, not an endless list of made up “functional” movements.
#3: Not Taking All of Your Training Into Consideration
The most effective strength and conditioning programs in the hockey training world are the programs that coordinate all aspects of skill, strength, and conditioning.
You have to understand that the areas of strength development, conditioning development, and skill development—are not separate compartments in your body when it comes to the accumulation of fatigue.
All of these sessions create an accumulation of fatigue and they all need to be taken into consideration when creating a program that you can still effectively recover from.
An important lesson here: I don’t want you to separate your skill work and strength work. I want you to see them as an extension of one another.
This means that you need to realize that training should be coordinated and integrated, not disjointed and separated.
For example, if you’re working on improving your alactic power output, it would be wise for your skill development to utilize these types of intensities and volume requirement as well.
Or, if you’re working on improving your aerobic base for hockey (which I deem as a minimum 60bpm or less) then your skill development work should incorporate these same types of lower intensity intervals.
The closer you get to the season and/or playoffs (the two-major peaking point of every season), the more coordinated your skill work and off-ice work need to be.
Any type of training you do will create very distinct effects on your physiology, these effects all need to be taken into consideration when designing your in-season and offseason programming.
This is is one of the main reasons I created an entire “auto-regulation” section within my in-season hockey program so that athletes could learn how to bob-and-weave with the punches of their active competitive season schedule and still make sure they’re recovering appropriately for optimal hockey performance.
Balancing this appropriately can be the difference between your strength and conditioning program helping you or hurting you.
Sample Hockey Conditioning Periodization Model
As stated several times throughout this conditioning project, from an energy system perspective, I like to primarily utilize tempo runs for GPP development – although I do often also throw in some aerobic circuits and combo-cardio sessions in as well, but we’ll visit that another time.
Then, I analyze hockey from all angles of my own experience, my own observation, and then, of course, the scientific literature.
From here, I use the principle of specificity, and ultimately work my way from GPP into SPP when the athlete is ready for it.
I also said above that I would provide an example of what this type of periodization may look like.
Here’s an example offseason periodization strategy for energy system development in hockey.
In the offseason, you need to focus on GPP early, and eventually work your way into SPP to get ready for the competitive season. Here is an example of how that plays out:
GPP: Month 1 – Phase 1
- Mobility sessions 1-2x per week
- Aerobic tempo running 3x per week
- Deload after 4 weeks
GPP: Month 2 – Phase 2
- Mobility sessions 1-2x per week
- Aerobic tempo running 2x per week
- Alactic conditioning session once per week
- Deload after 4 weeks
GPP: Month 3 – Phase 3
- Mobility session 1-2x per week
- Aerobic tempo running once per week (at this point they have reached the morning 60bpm)
- Alactic conditioning session twice per week
- Deload after 4 weeks
GPP Transitioning into SPP: Month 4 – Phase 4
- Mobility sessions once per week as mobility goals have been achieved and can be easily maintained with once per week sessions to allow more time and energy to focus on SPP
- Aerobic tempo running once per week to maintain aerobic base
- Alactic conditioning session twice per week using a few more hockey specific exercises
- Deload after 4 weeks
SPP: Month 5 – Phase 5
- 0-1 mobility sessions per week. Zero if the client has no problems, one if they still have those nagging joints/body parts that just don’t seem to loosen up unless they focus on them every week
- No more aerobic tempo sessions
- Alactic conditioning sessions are bumped up to three times per week now and heavily utilize hockey specific exercises
- Deload after 4 weeks
SPP: Month 6 – Phase 6
- Two weeks of programming that look identical to the programming in Phase 5 with only slight adjustments to exercise selection
- Two weeks of tapering and peaking prior to the start of the competitive season to maximize the fitness-fatigue model. Reduce all fatigue, heighten specific fitness to the highest possible levels
—
What is most important here is that you see the overall periodized structure because that is what this section is really all about. Creating cycles, not individual workouts.
Here’s the step-by-step process and what I want you to see and know:
- I assessed the GPP and SPP demands of hockey athletes
- I met the GPP demands in the beginning because those always come first, and I allotted enough time within these phases (four months) in order to accomplish these goals properly
- I slowly transitioned into SPP when the time was right (and didn’t immediately jump into SPP!)
- I slowly transitioned from GPP (Phase 1-3), into a hybrid of GPP/SPP (Phase 4), and then ultimately into pure SPP (Phase 5-6)
- I did this over the course of an entire offseason and didn’t try to rush anything
If you can stick to a structure that’s close to this but tailored a little more for your individual needs if the context requires it, you’ll be doing a great job at creating a true strategy for your hockey programming, as opposed to just a bunch of random workouts.
Sample Hockey Conditioning Workouts
Hockey Conditioning Workout
A: Eccentric Load DB Box Jumps 10 x 3 with 15 secs rest
B: Lay Down Turnaround Sprints: 10 x 10 yds with 30 secs rest
C: Bulgarian Split Squat Iso-Holds: 10 x 10 secs isometrics per leg, 20 secs rest
D: Skater Jump 5 x 3 per leg with 15 secs rest
E: Weighted Plank: 3 x 60 secs with 60 secs rest
Hockey Conditioning Workout with Rotational Focus
A: Horizontal hop into MB throw – 8 x 3/side with 45 secs rest
B: Crossover into MB shotput – 6 x 3/side with 45 secs rest
C: T-test – 8 x 1 with 45 secs rest
D: DB split squat jumps – 6 x 3/side jumps with 45 secs rest
Hockey Aerobic Conditioning Workout
A1: Lateral lunge and press – 2 x 8/side
A2: Landmine press – 2 x 8/side
B1: Seated banded abduction – 2 x 20
B2: DB Arc row – 2 x 15/side
C1: Pistol squat – 2 x 8/side
C2: Reactive plate drop – 2 x 8
D1: Iron cross – 2 x 8/side
D2: Inchworm with extension – 2 x 6
*No set rest times. Get right into the next exercise as soon as you can.
No Equipment Needed Hockey Core + Conditioning Workout
A: 8 x 4 split squat jumps (2 per side) – 25 secs rest
B: 10 x 15 yard back pedal sprints (backpedal 5 yards to start line then sprint to 10-yard line) – 25 secs rest
C: 8 x 4 Standing broad jumps – 15 secs rest (Jump, land and stabilize, Jump, land and stabilize, Jump, land and stabilize, Jump, land and stabilize = 1 round. 15 secs rest in between rounds)
CORE CIRCUIT [3 Rounds] — Run through the circuit without rest between exercises, rest for 2 minutes at the end of the circuit and repeat 3 times.
D1 – Bicycle abs x 10 per side
D2 – Reverse crunches x 15 reps
D3 – Side plank x 30 secs per side
Hockey Conditioning Podcast Episodes
Hockey Conditioning Training
Speed vs Conditioning Training
Hockey Conditioning Conclusion
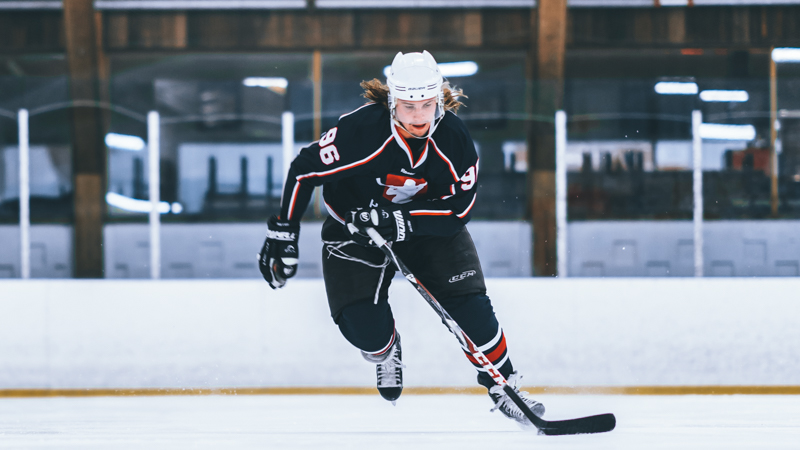
Be strong, be in shape.
Pretty simple motto.
Getting into shape does not mean that you need to be able to run a marathon or do an
Ironman.
Getting into shape means you are able to perform hockey-specific tasks at a high level of performance while being able to repeat those efforts without a major drop off in the performance of execution.
“Endurance” is not what we are trying to build here. It’s being explosive, faster, more agile, and with enough of a gas tank that if you had to fight for your life for the last 5 minutes of overtime, your conditioning wouldn’t be what failed you if you lost that battle.
I’ve written quite a few conditioning programs, quite a few meaning hundreds.
However, what I hoped to accomplish within this project was to change the paradigm of how hockey athletes approached their conditioning forever.
And then, layout exactly what you need to do and why you need to do it that way.
If your gas tank is rusted out and in need of repair, follow my above advice will not only “get you up to par” – it will transform you into to having elite, NHL level conditioning.
That’s what I want for you.
Go get it, and always let me know if you have any questions along the way.
If you would like to become a more conditioned hockey player or have a completely “done for you” periodized and structured hockey conditioning development workout program that incorporates both your on-ice and off-ice training needs, make sure you check out the Hockey Skills Accelerator.
It’s a game-changer.
It’s made hundreds of hungry hockey athletes just like you improve all levels of performance development so that you have newfound explosiveness out on the ice that will separate you from your competition all game long.
I hope that you were able to have some major takeaways here and that I was able to contribute back to an industry that has already given me so much.
I want to thank you very much for investing your time in going through this monster hockey conditioning article and I hope that I met your expectations on delivering what I set out to do.
If you like what you’ve read we’d love to have you join one of our Hockey Training Programs.
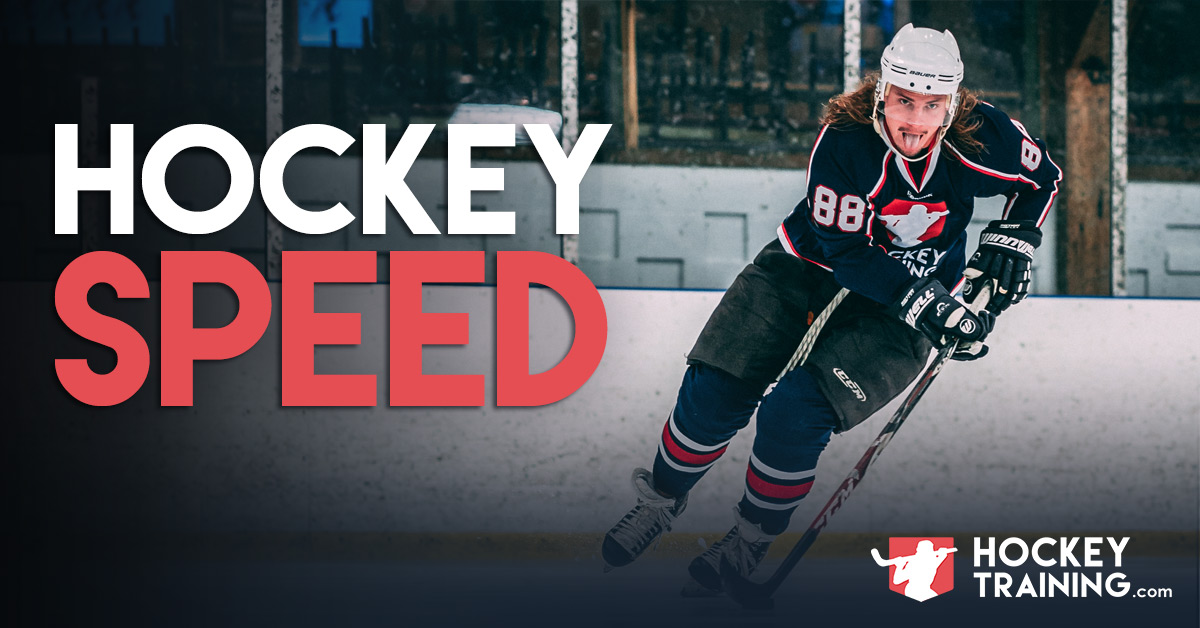
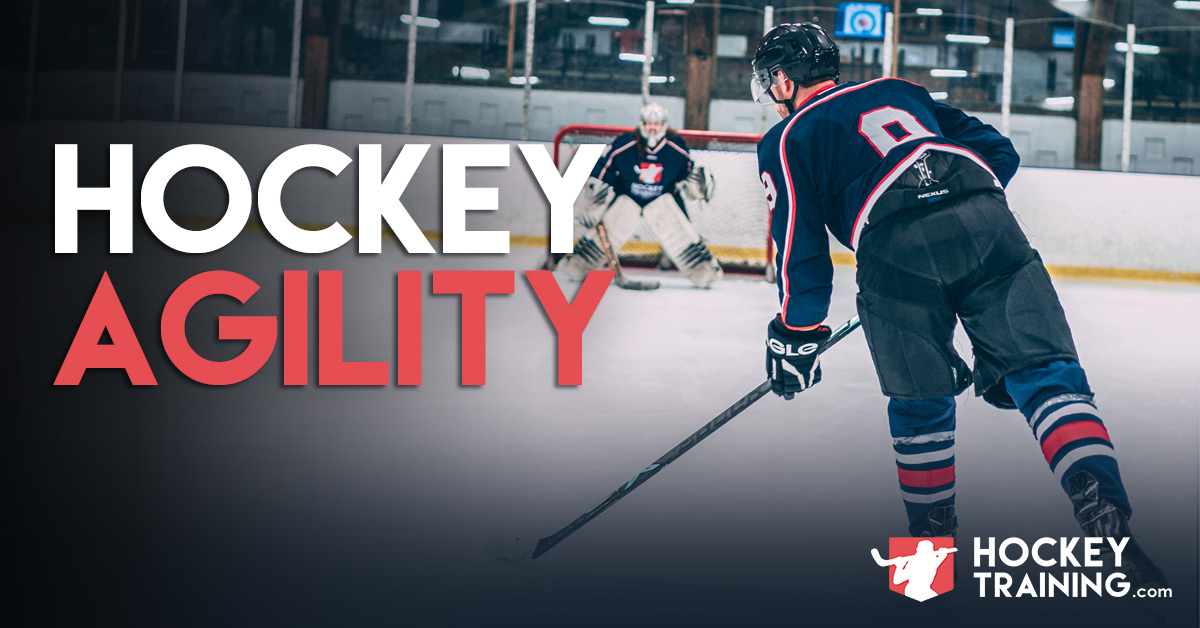


For the no equipment needed workout what can we do if we don’t have the space to do a 10 yard sprint
Give this workout a try: https://www.youtube.com/watch?v=tU0m-CTv6po&t=
This helped me so much, thank you! 🙂
Hi Dan, looking at your HIIT training you say that sessions are 20 min.
5 min warm up followed by
3 x 1-on-1-off
Would this not be an 11 minute work out? Just wanting to make sure I am not misunderstanding.
I have a 15 year old hockey player who is in puberty and has excess weight. He also has Osgood Schlaters and cannot run
He recently attended a WHL camp and his stamina was in question. Thinking some weight loss would greatly help. Could he do both a tempo run type work out and HIIT in the next four weeks of off season or would you do one or the other?
Also, do you feel HIIT would be best for weight loss?
Thanks in advance!
Lynnore
Hey Lynnore,
Note the two-minute on/off variation of that workout right below it that amount to 20 minutes — I was simply noting that the HIIT sessions are at most 20mins in length, but you’re absolutely correct that specific version you pointed out would be 11mins (provided you did no cool down).
Weight loss will definitely help his conditioning — it will make a very large difference in a very short period of time. A combination of tempo runs and HIIT training would be an excellent idea for this — but will be useless for weightloss unless his nutrition is in check. So, as long as that gets handled — yes, tempo runs + HIIT training would be perfect.
I am 42 and live in a one bedroom apartment with limited space. When the weather cooperates, I am able to work on my conditioning outside. Unfortunately, that is not always the case. I am thinking of purchasing a cardio machine. I am highly considering an assault air bike. I have read great things about it, but wonder if it is appropriate for hockey conditioning, specifically HIIT.
Hey Brandon,
Thanks for reaching out. The assault air bike is definitely a good option! And if it’s going to be a little while until you can get your hands on one, make sure you check out the 9-Minute Hockey Trainer and the Follow Along program because they are both perfect for someone in your situation.
9-Minute Hockey Trainer: https://www.hockeytraining.com/9-minute-program
Follow Along Hockey Training Program: https://www.hockeytraining.com/follow-along-program
In the last 10 years I did various attempts to start running again. Unfortunately even after a few short, very slow and paused runs my knee starts to swell and hurt (fortunately skating is a completely different story as there’s far less impact).
So my question is how would translate the exercise below “Runner A” in section “Tempo Runs for Hockey Conditioning” into an equivalent exercise on a stationary bike? Do I need to find my max speed on a bike for a certain distance or duration first(which distance / time interval? One equivalent to a 100m/yds run, i.e. 15sec?) and then go from there?
I’d be totally grateful if you could please show an equivalent example.